Tuesday, January 11, 2011

A cookbook for everyone

I'm sitting here on a cold winter's day, with snow still on the ground and I decided to pop in one of my favorite movies, Julie and Julia. It always inspires me to be creative when I cook. It's also one of the things that inspired me to blog. It got me thinking, Julie fell in love with The Art of French Cooking and blogged about it...what is my favorite cookbook? The Joy of Cooking...the title says it all. 


OK, cooking isn't a joy for everyone but it is for everyone in my family. I come from a long line of great cooks, some classic, some gourmet, but all of us love to cook. This cookbook has been around for decades and is truly a classic. Not only does it give you recipes but it teaches you HOW to cook and WHY certain ingredients should/shouldn't be used. In my family, this has been passed down for several generations. My mom gave me this copy back in 1998 and I've long since lost the cover from extensive use. There are several recipes that the book automatically opens to (apple pie I & banana bread) because I use it so much. She even inscribed a little note inside, which makes it that much more special: 


"This was your great grandmother's (Grandanna's), your grandmother's (Gimmer) and your mother's (me) favorite cookbook. I hope it will bring you as much Joy as it has all your Boone Family. - Love, Momma 7-31-98"
 Case in point, the Hubbie doesn't often have dinner requests so when he does make one, I know it's something I need to make. After all, "a way to a man's heart is through his stomach" and my hubbie is no different. Not long ago, the Hubbie requested (randomly) Shepherd's Pie. This conjured up thoughts of a quaint, little pub in England that I visited 6 years ago on a business trip but I didn't really know what was in a Shepherd's Pie, much less how to make one. That's where the Joy of Cooking came in. Sure enough it was in there and the recipe was delicious! Did you know that true Shepherd's Pie is made with lamb, not beef? If you make it with beef it's called Cottage Pie. 


Classic Shepherd's Pie

1 1/2 lbs all purpose potatoes, peeled & quartered
1 Tbs butter
1 medium onion, chopped
1 carrot, peeled & chopped (I used 2)
1 celery stick, chopped (I used 2)
1 lb ground lamb (easily found in the meat section of your grocery store)
3/4 cup beef or vegetable stock
1 Tbs all-purpose flour
1 tsp dried thyme
1 tsp dried rosemary
pinch of ground nutmbeg
salt & pepper


Preheat oven to 400 degrees. Boil the potatoes until done. Drain then add the butter and some salt & pepper.   Mash and beat the potatoes until fluffy (with wooden spoon or electric mixer - you can also use a hand masher).  Tip: taste them, if they taste like good mashed potatoes, then they are good. If not, add more salt or pepper. 


While the potatoes are cooking, in a medium skillet, over medium-low heat add 3 Tbsp oil, onion, carrot and celery. Cook until softened, about 15 minutes. Increase the heat to medium and add the lamb. Cook approx 10 more minutes, stirring to brown evenly. Spoon off any fat then add flour. Cook, stirring 2-3 more minutes then add stock, herbs and salt & pepper. Reduce heat and simmer until thick (about 5 min). 


Let cool slightly then transfer to a 9-inch pie dish or baking dish. Spread the mashed potatoes over the top. Scatter over the top 2 Tbs butter, cut into small pieces. Bake until potatoes are browned and the dish is heated all the way through, approx 30-35 minutes. Serve while hot straight from the pie dish. 


While you may think this is an odd dish, it's actually quite good. If you don't have this cookbook, I encourage you to get it ASAP. You'll not only have great recipes but you'll learn so much about cooking by just reading it. 


If you have a particular dish you want me to try and tell you about before you make it, let me know by posting  comment! I love trying new dishes! 


Bon Apetit! 


Saturday, January 8, 2011

DIY topiaries


Topiaries come in all shapes and sizes, even Disney characters can be found in the form of a topiary. There is nothing like a classic topiary to add a beautiful touch to your mantel, table top or kitchen counter. They are extremely versatile and never go out of style. I've always tried to keep the live topiaries...well alive...but they always turn brown and died or lost their shape too easily. Way too high maintenance for me! So instead, I created traditional topiaries with dried moss. Same "real" look but without all the maintenance. Below are simple instructions on how to make your own topiary. I've created a standard topiary in this post but get creative with the design (pictures are great inspiration)!

Supplies:
  • container(s)
  • topiary form OR styrofoam balls and dowel
  • moss 
  • glue gun
All of these supplies can be found at your local craft store.

topiary form and container (this form was already started)

supplies


Step 1 (for topiary forms):
Once you have heated your glue, begin by placing a dime to quarter shape of glue on the top most ball.

Step 2:
While glue is still hot, take a small amount of moss and press firmly on to glue, being careful not to burn yourself. Be sure that the moss is thick enough to cover the form so that it can't be seen. 

Step 3:
Continue attaching moss using the hot glue, being sure that the moss is layered evenly throughout. Always press the moss into the glue so that it will not only stick but also be more uniform. 

Step 4:
Once all of the topiary balls have been covered in moss, insert the form into the selected container. Place a small amount of glue around the edges of the form to hold it in the container. 

Step 5:
Using the same moss or different moss (for added texture), cover the remaining portion of the form at the base of the container. Using scissors, trim any strays so that it looks even and uniform. 
Two types of moss are used here to add texture


If you can't find a pre-made topiary form, follow these instructions:


Step 1 (if using styrofoam balls and dowels):
Drill a hole through the center of each styrofoam ball slightly smaller than the dowel.


Step 2:
Insert the dowel and create your topiary shape as you like

Step 3:
Place a small line of glue around the joints of the dowel and styrofoam balls. 

Step 4:
Follow instructions for standard topiary forms (above).


Viola! You now have a topiary to use to add class to any spot in the house. They look great paired on a mantel; clustered together on a table or put simply as an accent.


Friday, January 7, 2011

Enchiladas with a healthy twist?

As you may have read in previous recipe articles, I don't like to eat vegetables. Now I'm not completely horrible but lets just say my palate is pretty small when it comes to anything green. Of course I had to marry someone the complete opposite. Maybe that is God's funny sense of humor coming in to play. As featured before, I'm trying new recipes from Doubly Delicious. This recipe is a healthy spin on enchiladas and they are surprisingly delicious. And no, not the "it has no taste but it's healthy so we'll pretend like it does" kind've thing. It really is delicious! Don't let the ingredients skew your taste buds. Trust me...


Chicken Enchiladas


2 boneless chicken breasts, cubed
2 Tbs olive oil
1/2-1tsp garlic powder
1/4-1/2 tsp pepper
few dashes of chili powder
1/2 cup sweet potato or carrot puree (I used carrot)
1/4 cup sour cream (I used low-fat)
2 cups shredded cheese (2% mexican or cheddar)
6 (9-inch) or 4 large whole grain tortillas
1/2 cup spinach puree
1/2 cup salsa

Preheat oven to 350 degrees. Over med-high heat, add few tablespoons olive oil to skillet. Sprinkle chicken with garlic, pepper and chili powder. Cook until chicken is cooked through (no longer pink). Off the heat, mix the sweet potato or carrot puree, sour cream and half the cheese into the skillet. Grease baking dish with cooking spray. Fill each tortilla with skillet mixture. Place enchiladas seam side down in the baking dish. Dot the tops of the enchiladas with spinach and salsa then cover with remaining cheese. Cover baking dish with aluminum foil and bake until cheese melts and filling is hot (30-40 minutes). 

*to make purees, simply steam the vegetables until soft, then blend in food processor or blender until creamy. May need to add a little water to get creamy consistency. 

No really, it's good! 

Thursday, January 6, 2011

The thing new moms don't talk about...


Having recently become the mom to a beautiful, healthy baby boy named Charlie, I have had my eyes opened to a whole new world. I've watched my friends have kids and they always talked about "mommy brain" but I never could fully appreciate what it was. I was warned about it and truthfully it started when he was still in utero. In concept, I got it but not until you experience it do you ever really get it...literally. I find myself not focusing on conversations, trying so hard to listen but not able to really retain anything. It's getting better now that I can get a bit more sleep thankfully but I;m not sure I will ever fully get my full brain back. 

But that's not the point of this post...I want to talk about what every mom probably feels but no one really talks about. It's called Mommy Guilt. No one ever warns you about Mommy Guilt when you are pregnant. Everyone talks about how wonderful you'll feel and how it will be the happiest time of your life. So you are automatically set up with false expectations. 

Now don't get me wrong. I wouldn't trade parenthood for anything in the world and feel so blessed that God gave me this wonderful little boy. I hope we can have more children but it isn't easy the first time. There is a level of guilt you feel constantly...are you spending enough time with the baby? are you meeting their needs? are you doing the right things to help them develop? are you wrong to go back to work? are you holding them enough or too much? are you exercising? are you eating to lose the baby weight? are you spending enough time with your husband? There are all these questions that plague your brain all while operating on a minimal amount of sleep. And then to top it off, until you get your figure back or at least can button your pants without the use of a rubber band, you feel fat and frumpy. Not a good combination. 

We as women rarely talk about this part of the "joy of parenthood". Is it because we're afraid of what people will say or think? Is it because too many people will respond back "but it's all worth it" and make you feel worse? (a little tip: never say that to a tired new mom). When asked "How are you? How's the baby?" we respond "It's wonderful!" all while thinking - "I need help! I'm sinking without a life line!" And that's hard for someone like me who tends to be very positive and likes to think I can handle anything life throws at me. If you are used to getting everything done and being highly productive, this can add even more to the Mommy Guilt syndrome. 

In my experience, this leads to what is commonly known as post-partum depression. All that we thought we could do or all that we think we're expected to do doesn't get done and we feel very inadequate. Instead of doing a few things well, we now do everything mediocre. That can have a big affect on a woman's self-esteem. 

This all leads to the "super mom" persona that many of us feel like we need to achieve. Here's what I'm learning - IT'S NOT POSSIBLE. To be super mom that is. I can't cook dinner every night, make it to the grocery store when we're out of milk, get to the bank when it's time to pay bills or make it to the gym consistently (just to name a few). And that's OK. 

So if you're a new mom or about to be a new mom - it's OK if you can't get it all done! In fact, plan on not getting done most of what you used to. The important part is to focus on what really matters to you and for your family. If the laundry stays unfolded for two weeks, the dog hair piles up on the floor or you never make dinner or to the gym, life will go on. For me, spending time with Charlie before I go back to work, having a date night each week with my hubbie and the occasional visit to the gym (for mental sanity) are what's important to me. If I can get to those things each day then it was a good day. The rest I will get to later.

Popeye Spinach Casserole

How many of you have kids who HATE eating spinach? Well I have a recipe you should try. I freely admit I'm not the best at eating my vegetables. Ick. In fact, the hubbie tells me I would eat like a 13 year old kid if I could - junk, junk, junk - and he's right. Alas, he keeps a tight reign on me and my body likes to hold on to too many of those calories to make it worth it. The following recipe I grew up on and it doesn't taste like spinach. In fact, I loved it so much that I almost always requested it on my birthday. When we were kids we always called it Popeye Casserole because it made it sound more fun (but we also died our mashed potatoes because it made them more fun to eat...hmmm so my family is a little quirky but we have fun!) You can half it easily and it also freezes well. 


Popeye Casserole (AKA Spinach Casserole)

4 boxes of chopped, frozen spinach
1 pint sour cream
juice of 2 lemons
2 Tbs garlic salt

Boil the spinach for 10-15 minutes. Drain very well (I use paper towels to help get as much juice out as possible). Mix spinach, sour cream, garlic salt and lemon juice. Place in casserole dish and top with bread crumbs (optional). Bake 350 degrees for 30 minutes or until heated through. 

Wednesday, January 5, 2011

My favorite soup - Taco

 Many years ago my mom told me about a recipe she tried called Taco Soup. I have to admit I was a bit skeptical. Mexican is my favorite food. I could eat it every day if I was able but tacos were meant to be eaten by hand in a soft shell or a crisp, crunchy shell, not in a soup. I should have known better. What's the old adage? "Mom knows best"? After making it, not only was it super easy, but it quickly became my all-time favorite soup. So much so that I was banned from making it by the hubbie for a while (perhaps having it at least once a week may have been a bit overkill). In this version, you serve it over Tostito chips and chunks of cheese. The chips give it a slight crunch while the chunks of cheese soften and melt into the soup. Yum! My mouth is watering just thinking about it!


Taco Soup

1 can black beans (preferably no salt added)
1 jar salsa (mild or medium)
1 can mexicorn or fiesta corn
1 box no salt added or low sodium chicken broth
sharp cheddar or mexican cheese, cubed (I use the bagged, cubed mexican cheese)
sour cream
Tostito chips

Pour the first 4 ingredients into a small pot. Bring to boil and let simmer 10-15 minutes. Put a handful of chips and cheese in the bottom of individual serving bowls. Pour a serving of soup over chips and cheese. Top with spoonful of sour cream and serve. 

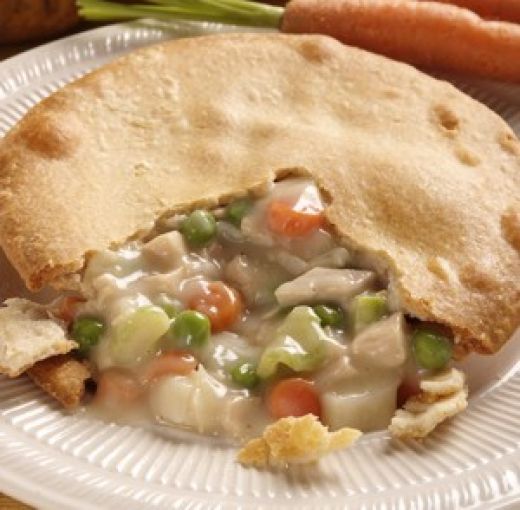
Warm comfort food - Chicken Pot Pie

One of Daniel's favorite comfort foods is Chicken Pot Pie. I'm not sure what it is about this hearty, warm, gooey, filling pie that is so satisfying on a cold winter night but it sure does hit the spot. My friend Jaime gave me this recipe and it quickly became a family favorite.


Chicken Pot Pie

1 box roll out pie shells (be sure they have 2 pie shells in the box)
1 can no salt added veg-all, drained
2 cans low sodium cream of mushroom or cream of chicken soup
2-3 boneless, skinless chicken breasts
black pepper to taste

Preheat oven to 400 degrees. Grease a pie pan and lay one pie shell down. Boil the chicken breast until done (approx 10 minutes). Cut into bite size pieces. Mix in veg-all, canned soup and pepper (approx 3-5 shakes). Pour into pie shell. Top with other pie shell and crimp sides so that the pie is sealed. Bake for 30-45 minutes or until top is slightly golden in color.  Let cool 10-15 minutes so that it sets up nicely. 

Makes great leftovers! 

Bon appétit!