Thursday, December 12, 2013

Going once, going twice, sold to #9!

Several of you have asked what I bought at the auction not long ago, the one I mentioned here. I have been meaning to post about it for over a week and kept getting distracted so here it is! And this should not be confused with the estate sales we also attend, which is at a house with pre-set prices. Oh and I fund these little excursions with my "kitty", which was recently refilled by selling two diaper bags on EBay.

Once again this auction proved to be a blast. I even went into it with a little skepticism because let's be honest, I didn't really "need" anything. But I found some things. I know this shocks many of you, including my mother. I can't help it mom. It's like a shopping zombie takes over my body.

Anna M joined me once again. She literally dragged herself out since she just had minor surgery on the Wednesday prior. (hope she doesn't mind I just aired her health info to the world). She was fearful of FOMO (fear of missing out) and of getting JOYS (jealous of your stuff). We also had a newbie, Tonia G, who is a veteran to auctions but hadn't been to one in a while. I really think she came for the entertainment. Anna squared is quite the act at times, especially at an auction.


We did come a little more prepared this time and brought the truck...or so we thought. I forgot to clean out the bed so it also had the stroller and hitch rack in it. Oops. Not so smart.


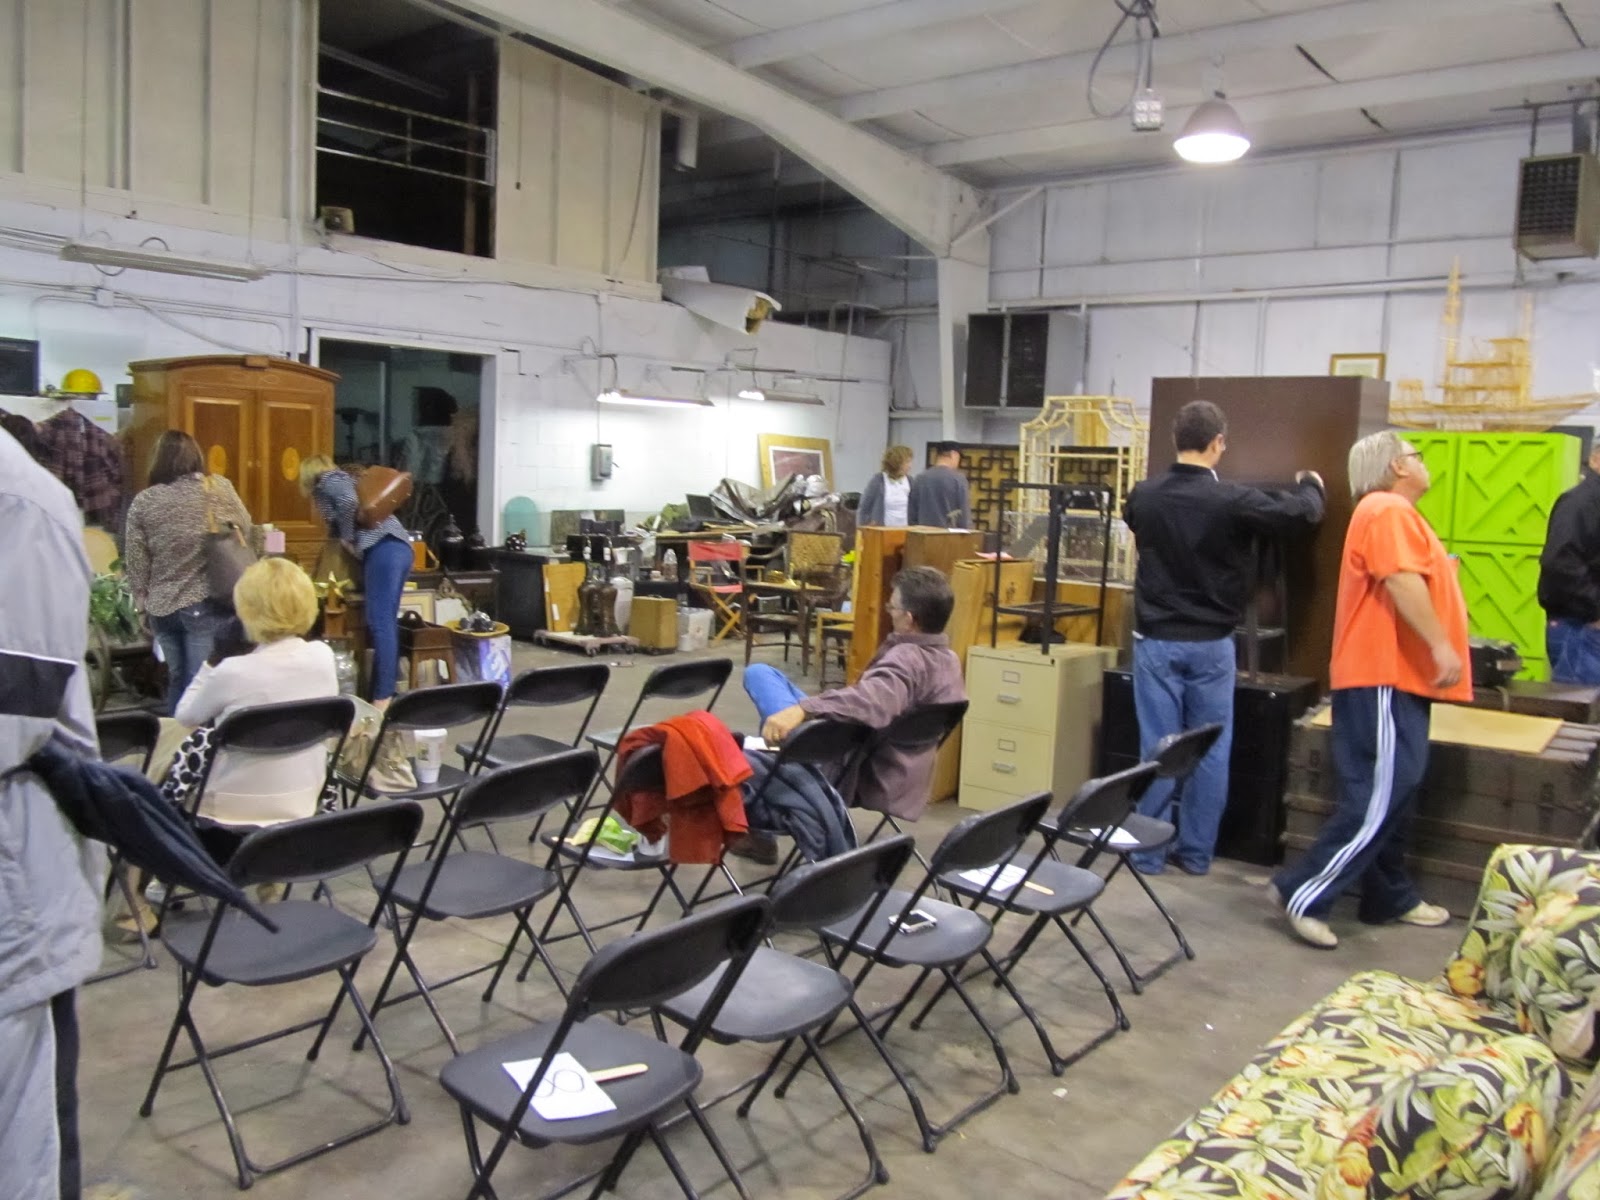
So off we went to register. I'll give you an idea of how this auction works (and most auctions for that matter). First, you register and get a number. I was #9 and Anna M was #10 (Tonia was there solely for entertainment).


In most auctions the "block" or what they will auction off is pre-set and settled. In this auction it's a little more open because they know they won't auction off everything; there's just too much. This is what it looked like inside:


At one point they needed more items on the block so I took it upon myself to help bring a few things forward. OK. I may have wanted to bid on them too. I'm blurry because it's an action shot.


This time there were tons of chairs and furniture, which was fun to dream of how we'd fix them up if we owned the warehouse and had all the time in the world and a little cash. Heck we could even do without the cash!


As you may  have now gathered, the majority of the fun for us is actually going through all the stuff and imagining what it could be. See that little chair dead center in the last picture? That went home with me for $5 to go beside my bed so I have a spot to put my pajamas, clothes, etc. You know for when you just want to toss something down for the next day or have quick access. Still don't see it? It's the red arrow. The white arrow is Tonia G.


The chair is not in great condition but it's sturdy. The fabric is old and it was covered in dust. I plan on putting a dark coat of wax over it to help recondition it and recover it after the first of the year. I was loving the blue chairs behind it but they were too big.
 
Speaking of chairs, I'd like to say we could sit still at these but we have to stand. It's too exciting. The juices start to flow - and by juices I mean endorphins - and I can barely even stand still much less sit still. At this point Tonia G is pretty much laughing non-stop. Especially when Chris, the auctioneer says "which one do you want, Anna". Yep he knows our names now.


Let's look at a few things I liked but didn't get. This was a pretty plant stand that looked like it was bamboo but it was actually metal. Imagine it painted and it would be so pretty in a sun room, porch or outside area. It would even be cute in a kitchen as a baker's rack.
 

This lamp, is not really attractive green but imagine if you painted it a red or blue or any color for that matter. Super cute.


I really wanted this Asian style armoire. Had no place to put it but I think it's so cute. I'd paint it another color since lime green doesn't necessarily go with my decor. And those wicker things you see on top and beside it are bird cages. The ship one was super cool.


So now on to the things we scored...Anna M got a cute set of chairs (6 to be exact) for $25! She's already recovered them in matching fabric for her kitchen table.


Look at how much better they look compared to the ones she had in there. Not to mention she only had 4 for a family of 5. Now I'm no math person but that doesn't add up. Now they are one big happy, matching chair-sitting family at dinner. Ahhhh. So sweet.


I also got a table and chair set (4) for a whopping $35 and they were like new. I bought them to donate to a family who needed them. $35 people. Like new.


Anna M scored 5 steeplechase prints that totally fit her house. I think she only paid $5 or $10 for the set.


I also scored two prints for $5 or $7 (I can't remember now) that I plan on putting up in the dining room or hallway. I love all things old Europe and so these crest pictures make me smile.


We both also got brass candle holders. Technically Anna M bought this...as soon as they said "sold to bidder #...9!" She realized that she was using my number. Good thing because I wanted it too!


I think the next purchase was a little FOMO kicking in but its cute and I'm sure I can find out where to use it. It was only $2 so no huge expense. And this brings up a good point. Sometimes we bid on things to help get it started. FOMO is contagious. If we think it's cute enough to bid on then others often realize it too.


I also got some cute frames. Well actually both of us bought 3 each but then Anna M realized she didn't need them so she gave them to me and I gave her my big iron angels (not pictured) to use.


The frames are brand new...priced at $5 each and we bought 6 for $10. They are a great little size to fill a small space on a table.

Perhaps one of my favorite things that I bought was a pair of lamps. I needed bigger lamps for my bedside table according to C and Anna M so when I found these in the back, I put them on the auction block. They are composite but look like hammered bronze. I still need to find some lamp shades so I'll show you those once I've found them.


There were other small odds and ends like the nutcrackers that we bought (for $3-5 total). Tonia G did score two bikes, which we put in the back of my truck...the one that had no room. Then we forced ourselves to leave.


 And it was pouring down rain...check out how drenched I am. Anna M thought it was funny that my glasses were covered in water drops.


Here's a picture of Tonia G and I trying to get the bikes home in the rain. Anna M was in the truck "looking pretty". OK fine, she also wasn't allowed to do any lifting. 


Remember when I said we were prepared by bringing the truck? Well thank goodness Tonia G showed up with her van so she could take Anna M's chairs. We left my table and chairs behind because we were out of room. No not permanently silly. I went and got them on Sunday.

I mean we even stored things in the car seats. We got everything home though! Where there's a will there IS a way, my friend. And when I say rain. Picture cold and constant.


We were a little packed in. Maybe we need to rent a Uhaul next time? No. Probably not. That might tip the scales against us with the spouses.

Tomorrow we are hitting this and this estate sale, this time with Jenna B in tow.

Tuesday, December 10, 2013

Crack Muffins


It's been awhile since I shared any new recipes. Mostly because I've been busy decorating, designing, trying to stay above water...you get the picture...to actually experiment. However a near tragic accident occurred the other day that almost caused me to lose my husband, mother-in-law and a dear friend. I lost the recipe for my Chocolate Chip Pumpkin Muffins.


No, I'm not being dramatic. My MIL nearly cried when I told her I couldn't find it and Anna M said that she might have to de-friend me. Daniel was slightly more forgiving. Only slightly.

Thankfully the MIL found it written down (it is one her mom found back in the 1980's) on a phone book she saved and all is well again. So because of this, I'm now putting the recipe on the blog so I don't lose it again! I've already used my blog to find a recipe I lost for something else. (hmm, see a pattern here? Perhaps it's the little elves that like to sit on my counter while I'm cooking).

We've affectionately coined these "Crack Muffins" because people swear there is a secret ingredient that causes addiction. There's not. They are just that darn good.

Chocolate Chip Pumpkin Muffins

2 cups sugar
2 cups flour
2 tsp baking soda
2 tsp cinnamon
2 tsp baking powder
1/2 tsp salt
1 cup oil
4 eggs
1 16oz can pumpkin
1 tsp vanilla

Mix together until creamy and then add 1-1.5 bags of chocolate chips (I use the dark chocolate or semi-sweet). Spoon in to muffin cups and bake for 18-20 min at 350 degrees.

Bon Appetit!

Monday, December 9, 2013

Decking our new halls...

One of the things I love about holidays - any holiday, not just Christmas - is that I get to decorate. For someone who loves and often dreams of decorating scenarios, any reason to change up the décor is fun.

This year I'm blogging my Christmas decorations so I can remember next year what I liked, what didn't work and maybe a few areas I want to add to. Why?

Case in point. This year I went crazy buying some new decorations at Hobby Lobby. I mean I looooovvvvveedd them. Pretty mercury glass candle holders and trees, new Christmas ornaments to hang from lights, etc. Turns out I couldn't use a darn one of them. OK maybe I did find use for one set of Christmas balls but literally, everything else went back. Do you know how deflating that is to a gal like me? Devastating.

Why take them back you ask? Well my logic was that I had 500 more sq. feet to decorate this year so therefore I needed more decorations. Wrong. Apparently I still have so many that I had plenty to go around. And somehow I feel like I have less table top space to decorate? I don't see how that's possible but it sure feels that way.

So instead of making twice the work (it takes a lot of time to return that stuff people) I'm logging what I did this year so that if I'm smart, which is a big 'ol gumby stretch, I may reference this little post before next season.

I broke the cardinal rule and started decorating before Thanksgiving. Since we travel I wanted to enjoy it for as long as possible during the season. It only took me 4 days to get around to it. (So mom, you can breathe a sigh of relief and no longer feel shamed. The tree didn't actually go up until AFTER Turkey day.)

Let's start with the kitchen shall we? Now I know next year it will look a little more finished because I aspire to have it painted by then. But you never know...


I used some new sequined red and green Christmas balls and hung them from my kitchen sink nook. It was easy with a little ribbon (and the help of Anna M). It's perhaps my favorite "addition" to decorating this year. Adding a little greenery and a ribbon to the lights made it that much more festive.


 And of course I always love my little snow man and JINGLE sign. There are also a few other nick-knacks on the shelves, including Peeples the Elf, but I didn't capture all of those. You'd be scrolling forever if I did.

Now on to our living room and our Christmas tree. I love our Christmas tree. It's so full and lush and takes up the entire big corner of the room. Using some magnolia leaves and faux red berries dressed up the mantle. There's also a wire reindeer in the center but he doesn't show up well in pictures.


I had to throw out my fur trimmed tree skirt this year (it got wet and mildewed...sigh...so sad). I bought a new fancy one but it was $40 and after a week of driving around with it in my car I returned it. The price tag hurt my feelings. Then Anna M suggested I just use some left over fabric around the bottom. Presto! Instant matching tree skirt. Why hadn't I thought of that!? Here's a little closer shot of the orange fabric I draped underneath. I believe I'll be doing this from now on.


Then there were the table tops with Santas, snowmen and a few scented candles...you'll notice we flip the tables in the living room, storing one in the office in order to fit the Christmas tree.


Overall it has made the room so cozy and festive! Especially when you walk in and see this from the front foyer. (Dad, did you notice I have the NC State game on the TV?! Don't worry, they will be Wolfpack fans despite growing up in Gamecock town.) And I probably just lost some readers.


And lets not forget the pretty wreath I made here that's in the foyer along with a Christmas cactus and a cute skinny, tall Santa.


You've already seen pictures of the dining room from this and this post but I still wanted it included in this post. I don't want it to feel neglected since it is one of my favorite rooms of the house.


And last but not least, our outside. I went with red as our pop of color this year. Red in the wreath, red bows, red accents on the snowman, red bow on the lantern...you get the picture.


Our side porch has garland draped with Christmas balls and a bow at each point, along with a light up wreath. I even put some red Christmas balls in the lantern by the door (and our other matching burlap wreath). It still kills me that we have no landscaping. One of our regrets of the renovation was getting rid of the overgrown shrubs so soon. We thought we could plant them this fall but funds went over and that was scratched off the list. So now we have none.


Friday after Thanksgiving I went to Anna M's to let the boys play together and put up her outside garland. She then she returned the favor by helping me spruce up my wreaths and outside. I was starting to feel a little stale so it helps to have a friend come over and make suggestions. We hung some leftover large Christmas balls in the tree near the grapevine pre-lite reindeer and added a few bows to the mailbox and light post.


There is also a blow up reindeer in the yard. I caved. Daniel has always wanted one and I'm always a "white light only" kind of gal. But he wore me down. I can't seem to capture a good picture of it at night, sadly. I must admit it's not as bad as I thought it would be. The boys love saying "it woke up!" at night when they see it come to life. Maybe next year we will have more shrubs so we can put up the rest of our outdoor lights.

The rest of the rooms in the house have little nick-knacks on the tables just to keep it fun and festive. I'm hoping to put the boy's tree up in their room next year but we didn't have the space seeing as how their dresser is still a changing table. Potty training. It's on the to-do list.

Anyone else had fun decorating for Christmas? Or were you a Bah-Humbug and chose not to decorate?

Thursday, December 5, 2013

Wreath me baby!

I mentioned here that Anna M and I conducted Operation Craft a few weekends ago. One of my goals, aside from painting my dining chairs, was to create new matching wreaths for my front doors. We now have two front doors in our new house so I didn't have two of the same wreaths. I searched high and low for options - and I was a bit ADD about it - or maybe bipolar. I get myself confused sometimes.

At one moment I loved whimsical and sparkly...another I liked earthy and natural. In the end I opted for something I could use during the year if I needed to. A burlap wreath. I found my inspiration from here and here. I loved the use of the letter too.

So off I went to Home Sweet Home Hobby Lobby for supplies. Don't worry. I had no idea what I needed. Because I'm prepared like that. I bought the following:

1. 2 wire wreath forms
2. floral wire
3. 2 wide spools of burlap ribbon
4. 3 medium spools of burlap ribbon
5. 2 bronze "S" letters
6. small spool of deco mesh-like ribbon in a gold/bronze color (for a little sparkle)

I already had plenty of ribbon options for the bows.

Here's where if I was smart I would show you a tutorial of how I made them. I'm not that smart.

Essentially I looped the burlap and with each loop would put a pinch of wire around it to allow it to stay firm. Since the wreath form had two circles, I did the wide burlap on the outside and the smaller ribbon on the inside. In hindsight, I might have made it a little tighter or maybe even used ribbon with a firmer hold or that was wired (mine is a bit floppy). Once the burlap was secured, I weaved the bronze deco mesh-like ribbon around it for sparkle.


And you may notice that they don't actually look like the inspirations. I started with the S in the middle and had plans to put a red bow on it...but when you looked at it from the road you lost it and it didn't "pop". So Anna M came over with some red deco mesh and we added it near the bronze/gold I had already weaved in. Then we added some red snow flakes I bought for the tree and added a bigger bow. That's when it came to life. Sadly my S's didn't make the cut. I may add them back after the holidays if I decide to convert these.


It would look even better if the doors were painted yellow. It's on my to-do list...maybe for 2014 (or 2015?).

So two wreaths down...only one to go, which promptly turned in to two. Confused yet? Yeah me too.

We both had the idea of doing a custom Christmas ball wreath. To be sure we could make them for cheaper than in stores AND we could pick the colors. Awesome, right? I decided to tackle it first. I chose several containers of Christmas balls - some normal size, some small (to fill in gaps) - in my colors (orange, gold, bronze and teal).

We had a hard time figuring out the best wreath form so I went with a Styrofoam form like this one. I bought one of each size since I wasn't sure what I wanted to do. I initially was doing this only for my dining room. The other option we saw on Pinterest was to wire the balls using a coat hanger in to a circle. That seemed too complicated to me and I opted for gluing. Anna M opted for the wire hanger. Let's just say that if it weren't for her "this is not going to beat me" attitude, her wreath might have ended up in the trash.

So let me show you how I did this wreath(s)...

Disclaimer: what you are about to read is my second attempt. The first one, while successful, had a few bumps in the road! Oh and this will be a short tutorial. You'll need to you use your imagination between step 3 and 4 thanks to the magic (and my laziness) of fast forwarding.

Step 1: pick your drink of choice. You're going to be here for a couple of hours. This is not hard but it is a little tedious (which is why mine has caffeine). I did it in front of the TV and it made it less so.


Step 2: spray paint your wreath form (learned this one the hard way!). Remember to buy spray paint that is Styrofoam friendly. I used a little bit of gold and the whole purpose is to cover up the color of the foam so that if you have little gaps (which you will have), you don't see white or green but rather a pretty color.

Step 3: once I poured all the balls in to a bowl for easy access, I started gluing them (with hot glue) to the outside of the form. Something like this:


Don't get OCD and try to make them even in color. Just glue them on - it will look better than if you did matchy-matchy.

Step 4: keep gluing all around keeping them close together and making sure you put the glue where it won't be seen (another lesson learned the hard way). You'll keep gluing all around with the larger balls and then once those are complete, add the small/tiny balls to fill in gaps and make it even. The tiny balls are important! Otherwise, it gets too fat when you're trying to fill in the gaps.

And with a little imagination and a large time lapse, the finished product looks like this:


And my larger one that's in the dining room looks like this:


They sort've look like the same size in these pictures but the orange/blue one is actually made of full size, medium and small balls while the red and gold is made of medium and tiny balls...if that helps put it in to perspective.
 
Not good at judging size and distance? Me either. Maybe putting it context will help.


Viola! Custom Christmas ball wreaths that I hope to have for years. I must say that after I made the second one and learned from my mistakes, I'm a little addicted. The first one was a doozie and I made lots of mistakes, had a few third degree burns and ran out of balls. Second one - peace of cake. If it weren't so expensive to get all the balls, I'd make a huge one to go outside on my house.

So there you have it - the second part of Operation Craft. Anyone else make any wreaths this year? I'd love to see pictures!