I bet I just got you thinking with the title of this post, huh? It sort've feels like a redneck Saturday afternoon. But here, let me explain...
First, not long ago I took the boys to my parents for a week. I worked from there and they got to play. While there I went through a few things that mom didn't want anymore and I fell in love with these birds.
When I mean fell in love, I really mean I pet them daily. I must have an obsession with birds and bunnies or perhaps animals that start with the letter B. There are four of them so three sit on the dining table (odd numbers are best) and another is in the man room with another set of birds. I truly love them and it's even more special knowing they are from a great-grandmother.
So that's where the birds come in...
You'll remember from this post that while the majority of the living room re-do was done, I was still missing my new pillows. They finally came in and it really does make a huge difference. Here, take a look...
This is before we had all the new pillows but after the re-do. Good but not great.
Now look with the prettier pillows. It really makes the couches look higher end (these are from Rooms to Go so by no means expensive).
It also helped add some additional texture and complimentary patterns to the room. I sometimes hesitate with the mix of modern and contemporary fabrics but in this instance I really liked it because it helped pull in some of the robins egg blue from the dining room.
So that's where the Down Pillows come in to this post...because all my couch pillows are now down and oh-so-comfortable-yet-georg.
That leaves the alcohol.
Another fun find at my mom's were these really pretty, old decanters. Can't you just imagine in the 1940's and 1950's having them set up on a bar with various libations in them, having a fun party with their pretty dresses and suits? The people wore the dresses and suits, not the decanters. That would just be weird.
While they probably aren't really functional now (some have a haze in them), they are still pretty and match the style of our house (it was built in the 1950's). So I set out to update the side table and make it truly more of a bar (or at least look like one).
It used to look like this...
It sort've became a catch-all for anything I didn't know what to do with like the candelabra and the vases. Now it has a purpose (or at least looks like it does) Fake it till you make it!
And here's a little secret, those liquor bottles underneath are not all full. Some are just cool jugs I had on hand that I thought looked good paired together with the rest. I also took a bag of old corks from my parent's and put it in the large glass jar for added decoration.
So there you have it. Birds, down pillows and alcohol are my recent decorating updates. I'm sure there are plenty of others coming but this was inexpensive and easy. Oh and I took down the Fourth of July wreath and put back up my monogram wreath. It also makes me smile.
Showing posts with label style. Show all posts
Wednesday, July 9, 2014
Monday, May 6, 2013
Mommy Style (part 1: Body Image)
I've had this idea about a blog post for months now and have even been keeping notes from magazines or ideas I get when talking to girlfriends. I'm finally making time to sit down and write it. Why did it take me so long? Not because it's profound but because I... 1) have two busy toddlers, 2) work a full time job, 3) help plan a charity half marathon race in April, 4) have a house to maintain (with laundry, cleaning, groceries, cooking, etc.) and 5) let's not forget I have a cute hubby and we need a date from time to time! In essence, I'm just like every other busy mom.
But that's what led me to think about this series. We are all busy but that doesn't mean as moms we should give up our style. And might I preface this by saying that t-shirts and sweat pants ARE NOT A STYLE. At least not a good one. So the next few posts are going to focus on the realizations I've had as a work-from-home mom and style. Think body image struggles, the "why bother" attitude, dressing for your body type, and some basic style tips.
Let's begin with what threw me for a total loop. Having kids. More specifically by how much my body changed. Yes, you get told it will change. Yes, you logically know that it will change. But you secretly keep hoping you'll be like Beyoncé or Gwyneth Paltrow and bounce right back by the time maternity leave is up (or within a few months). News flash: that didn't happen. The first time around (with Charlie)...I know why. I was already pregnant again. Ok. Giving myself some grace there. Second time around - what happened!?
For me, I had our boys back to back - as in 10.5 months apart - surprise! I will spare you the gory details so as not to cause you nightmares but that second pregnancy was a doozy. Suddenly I had the legs (hello spider veins!) and metabolism of a 90 year old, stretched skin and let's not forget I hadn't seen the inside of a gym in 2 years. I wouldn't change having my two boys for anything in the world and I love them dearly but it more than took it's physical toll on my body.
So let's talk about post-baby bodies, shall we? For the first six months after Cole, I was just trying to survive. I was "trying" to lose the baby weight but not 100% because I just couldn't manage it mentally. After all, it does take mental stamina to stick to a new routine and I went back to work at 8 weeks post-partum. I was exercising but not strictly watching my diet, and it was all I could do to make it all work. Finally, in March of last year (Cole was 6 months and Charlie was 17 months), I hit a low point. I didn't fit in to any of the clothes I tried on in my closet and no longer fit in to clothes off the rack at all my favorite stores. (I was shopping for something to wear for a wedding). I was still close to a size 16. For me, who loves clothes and shopping and fashion, that was devastating. I remember crying walking around trying to find something that fit my now changed body.
The next Monday I went on a low/no carb diet for 4 weeks and it was enough to kick start my metabolism and I shed 10 lbs and a dress size...but my body was still askew. My once problem area (stomach) was now even more of a problem area. The cute shirts I used to wear were too tight in the stomach now. The cute pants, skirts and dresses no longer looked as cute. It's almost as if all of the extra weight went straight to my stomach and stayed there. The hardest part of this journey has been not just how my body has changed physically but how I saw myself.
Mentally I felt horrible about myself and I got to where I OBSESSED about my weight. When I say I obsessed. I mean I obsessed. I weighed every morning and the happiness of my day depended on what the scale said. If I lost, it was a good day. If I gained, it was a bad day (mentally). I never felt pretty anymore. I always felt overweight and unattractive. I kept going to the gym but 3 days a week was all I could manage. I was too tired to stick to any serious "diet" but I didn't over do it either. It got to the point where Daniel would say "honey, I'm really worried about you. You've got to stop obsessing over your weight." It was all I could talk about. I brushed compliments off because I thought they were just being nice but weren't true. I no longer wanted to be very social or go out or shop. (cue the record scratch) What? Me not want to go shopping? Yep.
It has taken me almost a year to work through the obsession and unhealthy outlook. Deep down I knew it wasn't healthy but I didn't know how to stop it. It wasn't until I had dinner with a friend and she said out loud: "This is spiritual warfare". I knew it but I needed someone to say it out loud. Sounds crazy but it was and still is spiritual warfare.
If Satan could define my day by what the scale said, then I stayed in a constant state of negativity. I lost confidence in myself. I no longer approached life in the same way. It was even affecting my relationships, especially with my husband. It had to stop.
I made a promise that I would have a life verse to remember and refer back to whenever I struggled: 1 Peter 3: 3-4
"3 Your beauty should not come from outward adornment, such as elaborate hairstyles and the wearing of gold jewelry or fine clothes. 4 Rather, it should be that of your inner self, the unfading beauty of a gentle and quiet spirit, which is of great worth in God’s sight."
I now have a much better outlook on my body. It is likely never going to go back to pre-baby status. After all, my belly was stretched out for almost 2 years! But through lots of hard work at the gym and a lot of prayer, I no longer see a lumpy, ugly body. I see a realistic woman's body who birthed two beautiful, rambunctious little boys.
So if you too are struggling with your body image, regardless of what caused it, remember that we aren't supposed to look like the models or celebrities who eat, sleep and live to be a certain figure and get airbrushed. Our beauty truly comes from our heart and who we are in Christ. It took me a long time to figure that out again.
Now I'm back to loving shopping (sorry, honey!) and having a chance to dress up or go out. I don't even weigh very often anymore, but measure my weight by the clothes I wear (a comfortable size 12 by the way). My sassafras is even back. More importantly, I like the strong, more-fit me, post-baby belly and all.
But that's what led me to think about this series. We are all busy but that doesn't mean as moms we should give up our style. And might I preface this by saying that t-shirts and sweat pants ARE NOT A STYLE. At least not a good one. So the next few posts are going to focus on the realizations I've had as a work-from-home mom and style. Think body image struggles, the "why bother" attitude, dressing for your body type, and some basic style tips.
Let's begin with what threw me for a total loop. Having kids. More specifically by how much my body changed. Yes, you get told it will change. Yes, you logically know that it will change. But you secretly keep hoping you'll be like Beyoncé or Gwyneth Paltrow and bounce right back by the time maternity leave is up (or within a few months). News flash: that didn't happen. The first time around (with Charlie)...I know why. I was already pregnant again. Ok. Giving myself some grace there. Second time around - what happened!?
![]() |
| pregnant with Charlie |
![]() |
| Pregnant with Cole |
For me, I had our boys back to back - as in 10.5 months apart - surprise! I will spare you the gory details so as not to cause you nightmares but that second pregnancy was a doozy. Suddenly I had the legs (hello spider veins!) and metabolism of a 90 year old, stretched skin and let's not forget I hadn't seen the inside of a gym in 2 years. I wouldn't change having my two boys for anything in the world and I love them dearly but it more than took it's physical toll on my body.
So let's talk about post-baby bodies, shall we? For the first six months after Cole, I was just trying to survive. I was "trying" to lose the baby weight but not 100% because I just couldn't manage it mentally. After all, it does take mental stamina to stick to a new routine and I went back to work at 8 weeks post-partum. I was exercising but not strictly watching my diet, and it was all I could do to make it all work. Finally, in March of last year (Cole was 6 months and Charlie was 17 months), I hit a low point. I didn't fit in to any of the clothes I tried on in my closet and no longer fit in to clothes off the rack at all my favorite stores. (I was shopping for something to wear for a wedding). I was still close to a size 16. For me, who loves clothes and shopping and fashion, that was devastating. I remember crying walking around trying to find something that fit my now changed body.
The next Monday I went on a low/no carb diet for 4 weeks and it was enough to kick start my metabolism and I shed 10 lbs and a dress size...but my body was still askew. My once problem area (stomach) was now even more of a problem area. The cute shirts I used to wear were too tight in the stomach now. The cute pants, skirts and dresses no longer looked as cute. It's almost as if all of the extra weight went straight to my stomach and stayed there. The hardest part of this journey has been not just how my body has changed physically but how I saw myself.
Mentally I felt horrible about myself and I got to where I OBSESSED about my weight. When I say I obsessed. I mean I obsessed. I weighed every morning and the happiness of my day depended on what the scale said. If I lost, it was a good day. If I gained, it was a bad day (mentally). I never felt pretty anymore. I always felt overweight and unattractive. I kept going to the gym but 3 days a week was all I could manage. I was too tired to stick to any serious "diet" but I didn't over do it either. It got to the point where Daniel would say "honey, I'm really worried about you. You've got to stop obsessing over your weight." It was all I could talk about. I brushed compliments off because I thought they were just being nice but weren't true. I no longer wanted to be very social or go out or shop. (cue the record scratch) What? Me not want to go shopping? Yep.
It has taken me almost a year to work through the obsession and unhealthy outlook. Deep down I knew it wasn't healthy but I didn't know how to stop it. It wasn't until I had dinner with a friend and she said out loud: "This is spiritual warfare". I knew it but I needed someone to say it out loud. Sounds crazy but it was and still is spiritual warfare.
If Satan could define my day by what the scale said, then I stayed in a constant state of negativity. I lost confidence in myself. I no longer approached life in the same way. It was even affecting my relationships, especially with my husband. It had to stop.
I made a promise that I would have a life verse to remember and refer back to whenever I struggled: 1 Peter 3: 3-4
"3 Your beauty should not come from outward adornment, such as elaborate hairstyles and the wearing of gold jewelry or fine clothes. 4 Rather, it should be that of your inner self, the unfading beauty of a gentle and quiet spirit, which is of great worth in God’s sight."
I now have a much better outlook on my body. It is likely never going to go back to pre-baby status. After all, my belly was stretched out for almost 2 years! But through lots of hard work at the gym and a lot of prayer, I no longer see a lumpy, ugly body. I see a realistic woman's body who birthed two beautiful, rambunctious little boys.
So if you too are struggling with your body image, regardless of what caused it, remember that we aren't supposed to look like the models or celebrities who eat, sleep and live to be a certain figure and get airbrushed. Our beauty truly comes from our heart and who we are in Christ. It took me a long time to figure that out again.
Now I'm back to loving shopping (sorry, honey!) and having a chance to dress up or go out. I don't even weigh very often anymore, but measure my weight by the clothes I wear (a comfortable size 12 by the way). My sassafras is even back. More importantly, I like the strong, more-fit me, post-baby belly and all.
Monday, February 25, 2013
Hippty Hop!
Hippty Hop Easter's on it's way! I love a reason for decorating and Easter is no exception. I don't have much since a lot of the decorations are too cute-sy for me but I do try to put a little something out.
Since our plans were delayed this weekend (see this post), I decided that I would go ahead and decorate for Easter. It is super early this year so it will be here before you know it.
It all started with a need to remove a bloom-less set of bulbs on our sofa table that our sweet friends, The Adkins, brought us a while back. I'll plant them in the backyard soon but I needed something to go in the empty pot. My mom suggested I find a fake plant that looks real (they do make them) but I didn't find one on my shopping trip to Hobby Lobby.
As I'm walking around the store, I realize that they had some cute branches on sale. I have some at home but just a few. I snatched up 2 sets - one set of straight and one set of curly - to give visual interest. I already had some floral foam at home from this project and I already had Easter eggs. And viola!
Oh, I already had the little nest of eggs too. I bought it a long time ago with plans of doing something cute for spring but never got around to it. Subconsciously I must have had this in mind. And I've always wanted an Easter tree.
Literally, so easy to do...
My favorite part is I can take the eggs down and it can stay up for spring. There were some cute little birds at Hobby Lobby and I could nestle one in the branches for spring. While it's tall, it also doesn't visually take up space so it seems light and airy on the table, not the first thing you notice.
Once my masterpiece was created, I was off to the rest of the house...
(that's a picture of my parents, Nana and Pop-E. We have to keep them close because the kids like to carry their picture around since we can't see them often.)
And perhaps my next favorite Easter decorations oddly enough are in the bathroom...
I think maybe because I like the little wreath I have hanging above the sink. And I added a new plant from our shopping trip so it seems cozy by the one and only bathroom sink.
And finally the kitchen table...
We actually have the candles and greenery out most of the time during the winter months because they are practical. (we have no light on that side of the room so the candles help us see our food!) I just added the bunnies and some eggs to make it more festive.
So what about you? Do you decorate for Easter? Any cute ideas? I found a few on Pinterest but decided I didn't want to buy candy to decorate with and used more of what I already had instead.
P.S. sorry for the bad pictures. We've apparently lost our camera somewhere in the house...maybe it's a sign we need to save for a really nice camera instead of a point-and-click version.
Since our plans were delayed this weekend (see this post), I decided that I would go ahead and decorate for Easter. It is super early this year so it will be here before you know it.
It all started with a need to remove a bloom-less set of bulbs on our sofa table that our sweet friends, The Adkins, brought us a while back. I'll plant them in the backyard soon but I needed something to go in the empty pot. My mom suggested I find a fake plant that looks real (they do make them) but I didn't find one on my shopping trip to Hobby Lobby.
As I'm walking around the store, I realize that they had some cute branches on sale. I have some at home but just a few. I snatched up 2 sets - one set of straight and one set of curly - to give visual interest. I already had some floral foam at home from this project and I already had Easter eggs. And viola!
Oh, I already had the little nest of eggs too. I bought it a long time ago with plans of doing something cute for spring but never got around to it. Subconsciously I must have had this in mind. And I've always wanted an Easter tree.
Literally, so easy to do...
- put floral foam in the bottom of any container so it's snug (and not all the way to the top, I just used 2 bricks for this large container)
- shove the sticks in so they are clustered towards the back but spread out enough to span the container
- stick a simple plant in the front and put a little moss around it to cover the pot if necessary
- nestle the nest of eggs in the branches
- hang Easter eggs
My favorite part is I can take the eggs down and it can stay up for spring. There were some cute little birds at Hobby Lobby and I could nestle one in the branches for spring. While it's tall, it also doesn't visually take up space so it seems light and airy on the table, not the first thing you notice.
Once my masterpiece was created, I was off to the rest of the house...
(that's a picture of my parents, Nana and Pop-E. We have to keep them close because the kids like to carry their picture around since we can't see them often.)
And perhaps my next favorite Easter decorations oddly enough are in the bathroom...
I think maybe because I like the little wreath I have hanging above the sink. And I added a new plant from our shopping trip so it seems cozy by the one and only bathroom sink.
And finally the kitchen table...
We actually have the candles and greenery out most of the time during the winter months because they are practical. (we have no light on that side of the room so the candles help us see our food!) I just added the bunnies and some eggs to make it more festive.
So what about you? Do you decorate for Easter? Any cute ideas? I found a few on Pinterest but decided I didn't want to buy candy to decorate with and used more of what I already had instead.
P.S. sorry for the bad pictures. We've apparently lost our camera somewhere in the house...maybe it's a sign we need to save for a really nice camera instead of a point-and-click version.
Cabin Fever
This weekend was a little unplanned...well it was planned but yet again sickness changed those plans. So when sickness has the kids down and you have crazy sick children a little cabin fever, what else better to do than decorate! What? That's not what you do?
Since our Saturday night plans with friends coming for dinner had to be delayed (boo hiss) due to massive head colds (double boo hiss) the kids came down with Friday night (and our friends have a 3.5 mo old that does not need it) we decided to take our time over the weekend doing our chores and errands. After cleaning the house on Saturday I decided this was a perfect opportunity to decorate for Easter. Plus, I really felt the urge to change up some of our table tops that were starting to bug me.
I took Cole (who seemingly has it the least) to my favorite little craft store, Hobby Lobby. Boy did we I have fun! Cole had fun too once he got to hold a little bunny he found on a shelf. After scouting the Easter section and getting a few things for the boy's Easter basket, I found this cute little basket in their spring section. I wasn't sure what I was going to do with it but I loved the shape. Look how cute it turned out holding magazines behind the couch...
Originally all my "need to read" magazines were just stacked on the faux table but it didn't look as polished. I love the worn finish on it and it was only $14 since all the spring items were 30% off. I can also see this basket holding toilet paper in a bathroom, used as a trash can in an office or storing toys in a kids room (painted if you didn't like the finish). Sort've wish I had bought the larger one too...hmmm.
Then I found a cute picture frame that works well by itself. Sometimes frames need some substance behind them to be able to stand alone. Disregard the random child in the picture...I'm working on replacing him with my own children. And once again, thanks Hobby Lobby for great sales (this was 50% off).
I love how it works in the center of the table now. And don't mind the Easter decorations at the other end of the table...more on that soon.
On Sunday we took a little trip to Lowes because we needed touch-up paint but also because I needed some new house plants. Some of mine have gotten too big or died. And while I had high hopes of putting a cute Easter decoration on the coffee table, the kids throwing my Easter eggs around like they were bouncy balls quickly changed my mind. I decided the fight wasn't worth it. So instead I opted for some greenery found at Lowes. Simple yet effective. Plus I already had the container.
Of course then I start walking around the house wondering what else I didn't like and could shift around fairly easily. I realized that our poor dresser top in our bed room needed much help. I usually walk by it intentionally looking the other way so I don't notice it. I ideally would like to paint this...even bought paint in an orangy-red color but I'm not 100% sure it would stay in our bedroom if when we move so I don't want to commit to the color choice yet.
This is just a small spot but basically the whole top of it has peeled away thanks to cheap furniture and water. So instead I took a basic table runner I had stored away that coordinated with our bedroom colors and viola! No more ghetto furniture.
I'll have to share more about the Easter decorations in a separate post. I had hopes of putting it all in one but alas, I'm too long winded and I really want to describe the one item I made since it's super easy and inexpensive.
Hope we are all well for a while...I'll run out of money if we aren't! #cabinfevershopping
Labels:
decorating,
do it yourself,
how to,
organization,
style
Wednesday, November 28, 2012
Mirror, Mirror on the wall...
Let's face it ladies. It takes more than soap and water to keep us looking young and vibrant, especially if you have kids! And here you thought this was going to be about a mirror and some decorating advice.
I've had several people ask me what I use on my face for cleaning or make-up so I thought I'd post some of my favorite things. About two years ago (ironically coinciding with Charlie's birth) I felt like I started looking older and more haggard. Now of course I'm getting older but 35 was hardly the age I should feel like I was looking old. So I started experimenting. About 6 years ago, my friend Jaime bought me a starter kit for Bare Minerals for my wedding. Love it. I am a huge fan of their powder foundation, concealer and bronzer. I don't use the bronzer in the kit but I do use another one they carry. I also like some of their funkier eye shadows that sometimes come in kits but don't generally use the rest of their products.
So if you are looking for a great make-up that really improves the look of your skin yet still looks natural (plus it's easy to apply) then Bare Minerals is it. I tried all the other options including Bobbi Brown but Bare Minerals was the best.
Now as you know if you have kids, you don't have tons of time to get ready in the morning, especially if you are trying to get to work or to an appointment. So my routine is super fast - seriously I'm talking 3-5 minutes max. I use a few brushes but I apply my blush and eye shadow with my fingers! So here's the run down...
I've had several people ask me what I use on my face for cleaning or make-up so I thought I'd post some of my favorite things. About two years ago (ironically coinciding with Charlie's birth) I felt like I started looking older and more haggard. Now of course I'm getting older but 35 was hardly the age I should feel like I was looking old. So I started experimenting. About 6 years ago, my friend Jaime bought me a starter kit for Bare Minerals for my wedding. Love it. I am a huge fan of their powder foundation, concealer and bronzer. I don't use the bronzer in the kit but I do use another one they carry. I also like some of their funkier eye shadows that sometimes come in kits but don't generally use the rest of their products.
So if you are looking for a great make-up that really improves the look of your skin yet still looks natural (plus it's easy to apply) then Bare Minerals is it. I tried all the other options including Bobbi Brown but Bare Minerals was the best.
Now as you know if you have kids, you don't have tons of time to get ready in the morning, especially if you are trying to get to work or to an appointment. So my routine is super fast - seriously I'm talking 3-5 minutes max. I use a few brushes but I apply my blush and eye shadow with my fingers! So here's the run down...
- Bare Minerals for foundation/powder, concealer and bronzer (to define cheeks) and I use their brushes that came in the starter kit to apply them. I recently switched to their pressed powder foundation and it covers better and more evenly but be sure to color match. It's not the same shades as the loose powder.
- Philosophy's Hope in a Tube- use just a dab under my concealer under the eyes to help it sit well and go on smoother
- Stila's cream blush - huge fan of cream blush as I think it looks fresher and also is super easy to apply with your fingers. Just dab a little on the apple of your cheeks.
- Lorac's dual mascara - on one end it's a conditioner/primer and the other is the mascara. I find it helps my sad little eye lashes look fuller and also stay healthier
- Maybeline or any other generic eyeliner (or sometimes I use eye shadow as liner)
- My favorite eye shadow is an Ulta brand that I usually apply with just my fingers. I don't tend to spend much on eye shadows
- Lipstick and Lip Gloss are Bobbi Brown. I occasionally will use Mac but 99% of the time it's BB. I won't really even buy other kinds anymore because it's just even comparable. (if in Columbia, it's found at the Belk at Columbiana Mall)
Simple, easy, not a huge fuss. Of course I have other things I use if we're going out and I want to spend more time on it but generally, I go with basics.
Optional items are Bare Minerals Prime Time that helps the powder go on smoother and stay on longer. I've also heard good things about their new under eye concealer but I haven't tried it yet.
As for my skin care, I've recently adapted a new routine. I must wash my face at night and I must use a wrinkle fighting skin care treatment. If you don't use one or you don't wash your face and moisturize at night (no matter your age) - START! It will make a difference.
I just bought a starter kit by Philosophy (found at Ulta) that is Miracle Worker for anti-aging. They have a lot of other options but this one seemed to fit the best for me. I've used it for a few weeks and can already tell a difference in my skin and under my eyes where I tend to have dark circles, wrinkles and puffiness. Here's the steps:
- Wash: generic towelettes similar to Oil of Olay (not the pre-wet ones) to remove make-up. I find mine at the grocery store.
- Philosophy's Miracle Worker (retinoid pads): these are anti aging retinoid pads that come with a serum you pour over them when you first open. I cut them in half so they last longer. Once your face is clean you simply wipe this across your entire face.
- Philosophy's Miracle Worker Anti-Aging Concentrate: simple little serum you apply to your face
- Philosophy's Eye Hope: used under the eye to fight dark circles, puffiness and lines. A half pump of the bottle is all you need each night.
- Philosophy's Miracle Worker Anti-Aging Moisturizer: this is a great moisturizer that leaves the skin soft and supple
Now I will warn you that none of this is cheap. The starter kit was much less expensive which is why I started there, but it doesn't come with the Eye Hope. Keep in mind it does last for a very long time (the small bottle of Eye Hope lasts 9-12 months so it makes the $50 price tag hurt a little less).
So there you have it, my favorite items in my make-up basket and the new skin care products I just discovered. And I have come to realize that some of the wrinkles under my eyes are not going to go away no matter what I use. Those are from age, genetics and sun damage. But at least I can fight new ones!
I hope that helps all of you who are searching for new brands or something to work for your skin.
Does anyone else recommend any really good products? Like any particular skin care line?
Friday, August 24, 2012
Rugs
It occurred to me that I never updated about the new rugs we bought earlier in the year. As you know, we have a long room that is our living and dining room. I divide the space using a chair and the rug centers the couch/living space. For so long I've used a 5x7 until one day I was looking at pictures and thought "why do we have a teeny tiny rug in this huge space?" Suddenly I realized it looked so small and wrong! Was I blind before?
Anyway, we had a $500 budget for an 8x10 rug. I knew I was going to have to be creative on this one. All the big box stores had patterns that didn't really match our colors. Or they were too contemporary in design for me to like long term. The designer stores were too expensive. I finally found (thanks to my friend Cecelia) a discount shop in West Columbia (Doug's Rugs). Low and behold! They had what I needed for under my budget.
So home I came with two babies, a double stroller and two 8x10 rugs. Wish I had taken time to actually snap a shot of my car. A little comical to say the least. Here are close-ups of the patterns. Both had more traditional feel since that's what I currently have throughout my house, and both had the pumpkin orange/rust colors. And of course the most important, a heavy pattern so dog hair and juice spills or other toddler stains wouldn't be easily seen.
Here is a before of the living room...
And here's the after.
So much better! Now the space looks better grounded and in proportion. We went with the lighter rug in the living room since once we saw it in the natural light, it looked lighter and better with our current furniture.
What to do with the other rug? Return it? That would have been the financially responsible thing to do. But since it was still just a smidge over my total budget, I decided to try it in the back multi-purpose room (AKA man room/office/guest room).
Before...a tiny island of a rug.
And after...what feels like a larger room!
So if I have to offer any advice:
Anyway, we had a $500 budget for an 8x10 rug. I knew I was going to have to be creative on this one. All the big box stores had patterns that didn't really match our colors. Or they were too contemporary in design for me to like long term. The designer stores were too expensive. I finally found (thanks to my friend Cecelia) a discount shop in West Columbia (Doug's Rugs). Low and behold! They had what I needed for under my budget.
So home I came with two babies, a double stroller and two 8x10 rugs. Wish I had taken time to actually snap a shot of my car. A little comical to say the least. Here are close-ups of the patterns. Both had more traditional feel since that's what I currently have throughout my house, and both had the pumpkin orange/rust colors. And of course the most important, a heavy pattern so dog hair and juice spills or other toddler stains wouldn't be easily seen.
Here is a before of the living room...
And here's the after.
So much better! Now the space looks better grounded and in proportion. We went with the lighter rug in the living room since once we saw it in the natural light, it looked lighter and better with our current furniture.
What to do with the other rug? Return it? That would have been the financially responsible thing to do. But since it was still just a smidge over my total budget, I decided to try it in the back multi-purpose room (AKA man room/office/guest room).
Before...a tiny island of a rug.
And after...what feels like a larger room!
So if I have to offer any advice:
- always add rugs to hardwood floors - it softens the room
- consider adding rugs over carpet if you need an anchor for the room
- ALWAYS look at scale. You can see how much difference a larger rug made in our space.
Thursday, August 23, 2012
It's the simple things that make a huge difference
Well as I was creating a new faux console table, I decided I was bored with all my tables in the living room. Plus I had to now find a place for the old sofa table, preferably not in the shed where Daniel would have a conniption fit.
And when did I decide to do said project? Oh, Friday just before I had company coming to spend the weekend and when I had a ton of work reports due. Because you know, that's smart (not.) I work well under pressure. Game on.
By noon, every table and every accent item was somewhere in the middle of the living room. I dared not stop to take a picture since I was on a massive time constraint. At one point I wanted to breakdown in to the ugly cry but I had to shake it off and focus.
I ended up moving my office side table to the living room. As you can see, before we had a chair and the toy box (hidden in this picture) in that corner. No table.
And now...much cozier! I can't believe how well my printer table (from Hobby Lobby) looks in that corner.
And where did said toy box go? In the kid's room. As you can see from this post, I had a red metal tin to store toys in their room but it was still a little junky looking sitting right at the door. Plus I decided that they really didn't need the majority of their toys in the living room. It's not like they have to go far, it's a small house!
So that left the old sofa table to put somewhere. It was meant to be. It fits perfectly in my office space in our multi-purpose room. I now have even more room to put office-y things but still hidden and out of the way.
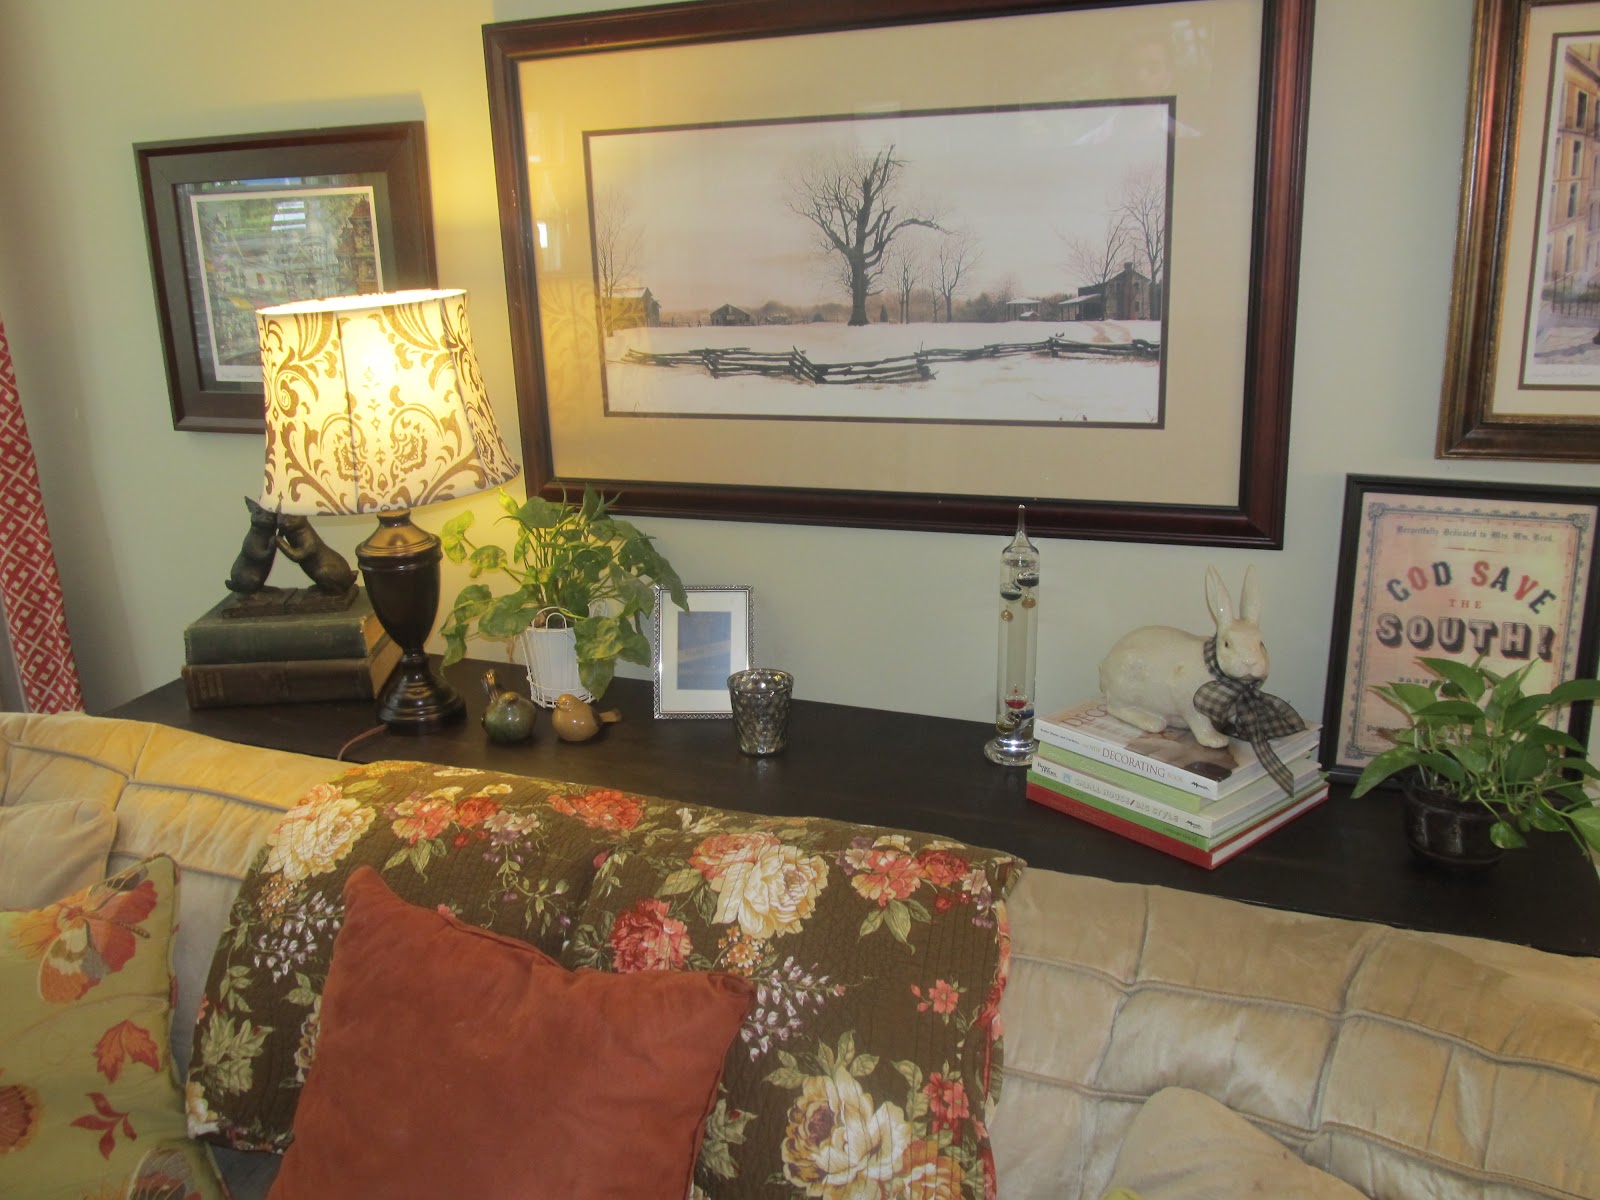
Now back to the fun part, sprucing up all those tables. I basically took everything down and started over, lamps included. Sort've like you do when you have to take down Christmas decorations and put your regular stuff back out. Then slowly, I started putting one item up at a time. The armoire now houses more pictures...
As you may notice, it reached beyond the table tops and expanded to the walls. Now that we had a longer table, I could create a better gallery wall. It took moving only a few pieces around to make it fresh again. The framed S is actually the S that was on my mantel that I put an old gold frame around. No glass, just a frame I picked up some where along the way that's been sitting in a closet.
Here it is from a slightly different angle.
The gallery wall, the longer sofa table and the reworked table tops all make it feel much cosier now. I did find a cute basket at Target that gives us a place to store a few toys in the living room. Since Cole isn't walking yet, it's easy to reach over and grab a few toys locally when I put him down towhine play.
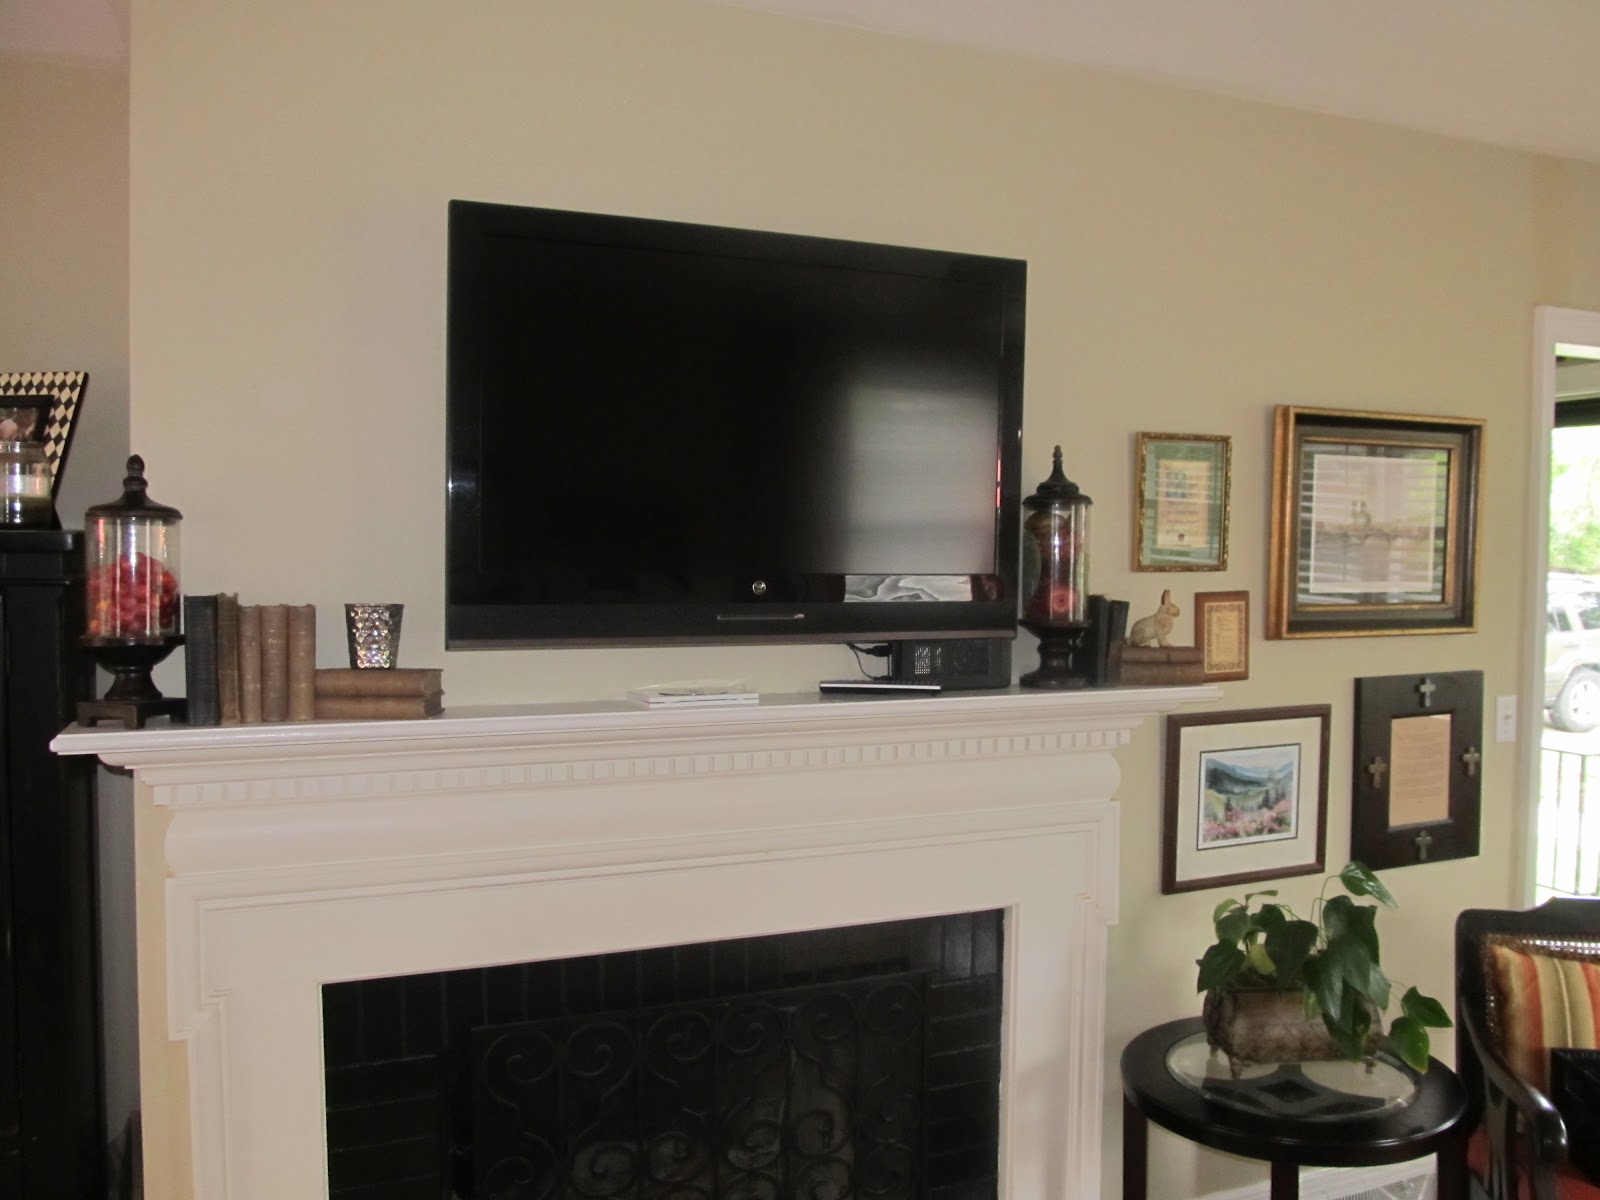
I do have one dilemma. What to do with my mantel. I will never place a mantel above my fireplace again. I wasduped persuaded by my husband this time but not again. Anyone have any suggestions? It's not easy finding pictures of a mantel decorated with a TV in the design books. I moved a few things around but it's still missing something.
So there it is. One faux table behind the sofa ended up inspiring a completely new feel for the living room. Now I am in love with the space once more. And the kids seem to like having the toy box in their room and I have extra desk space in my office nook. Now that's what I call a win-win-win.
OK your turn. What do I do with my mantel if taking the TV down is not an option?
And when did I decide to do said project? Oh, Friday just before I had company coming to spend the weekend and when I had a ton of work reports due. Because you know, that's smart (not.) I work well under pressure. Game on.
By noon, every table and every accent item was somewhere in the middle of the living room. I dared not stop to take a picture since I was on a massive time constraint. At one point I wanted to breakdown in to the ugly cry but I had to shake it off and focus.
I ended up moving my office side table to the living room. As you can see, before we had a chair and the toy box (hidden in this picture) in that corner. No table.
And now...much cozier! I can't believe how well my printer table (from Hobby Lobby) looks in that corner.
And where did said toy box go? In the kid's room. As you can see from this post, I had a red metal tin to store toys in their room but it was still a little junky looking sitting right at the door. Plus I decided that they really didn't need the majority of their toys in the living room. It's not like they have to go far, it's a small house!
So that left the old sofa table to put somewhere. It was meant to be. It fits perfectly in my office space in our multi-purpose room. I now have even more room to put office-y things but still hidden and out of the way.
Now back to the fun part, sprucing up all those tables. I basically took everything down and started over, lamps included. Sort've like you do when you have to take down Christmas decorations and put your regular stuff back out. Then slowly, I started putting one item up at a time. The armoire now houses more pictures...
The sofa table has a new lamp (from the office) and other fun items...
Here it is from a slightly different angle.
The gallery wall, the longer sofa table and the reworked table tops all make it feel much cosier now. I did find a cute basket at Target that gives us a place to store a few toys in the living room. Since Cole isn't walking yet, it's easy to reach over and grab a few toys locally when I put him down to
I do have one dilemma. What to do with my mantel. I will never place a mantel above my fireplace again. I was
So there it is. One faux table behind the sofa ended up inspiring a completely new feel for the living room. Now I am in love with the space once more. And the kids seem to like having the toy box in their room and I have extra desk space in my office nook. Now that's what I call a win-win-win.
OK your turn. What do I do with my mantel if taking the TV down is not an option?
Wednesday, August 22, 2012
Faux Sure
For a very long time now...maybe a year at least...I've wanted a true sofa table that spanned the length of my couch. Yes. I'm aware that sofa tables are not meant to do that because they usually go in an open area where they are seen. Well mine is behind my couch against a wall so I really wanted it more for table space than looks. I fancied the idea (after searching high and low on the Internet for an 80in skinny table) of making my own (like they did) but...
So I've just dealt with the space for said time. But I finally had enough. The area just got junkier and junkier as the cords, boxes, dog crate, etc piled up "behind the couch".
It's hard to tell in the picture above (probably because I was always sure to keep it hidden in pictures) but behind that couch is scary. It really is most noticeable when you first walked in and when you sat on the couch and when you sat at the dining table and when you walked in from the kitchen. OK so maybe it was really noticeable except in this picture.
I finally decided to make my own hanging shelf like I did in the kitchen. A sort've faux console table if you will. After all, no one will really know since it's hidden behind the couch anyway. And it was fairly immediate (low labor) and much cheaper.
Off to Lowe's I went to find wood. I bought a standard 16"x96" stain grade wood ($30) and had them cut it to my size (80"). They had cheaper lumber available but since I wasn't planning on painting but rather staining, I needed a higher quality board. I could have bought a 72" standard size for much cheaper but I knew deep down I'd miss those 8" behind the couch and regret it. Next I simply stained it with the same stain from the table project and then sanded it down a bit to give it a worn look.
I decided I didn't want a slick look (i.e. polyurethane) so I checked around and bought some wax instead.
I'm not going to lie. This stuff isn't cheap ($25!) but it's well worth it. I loved how easy it went on (simply apply with some cheese cloth, let dry and buff) and how it gives it a great muted sheen like furniture you buy in store. I knew I would need some for a dresser I plan on painting (some day) too. I only had to use a small amount for this project since I only did one side.
Then came the hanging...and by this point the boys were home. Charlie was an awfully good helper (albeit slightly scared of the "momo" or drill). Don't mind me. I'm still in my workout clothes from the morning.
Using simple brackets (3 to be exact) it was simple and easy to hang.
Don't mind the unstained end. I fixed that when I realized I had forgotten to flip it over initially. Once I moved the couch back, it was fun to start decorating! Look at what a difference the longer table makes.
You can really see the length in this wider view.
And all the pretty things I can put on it now...
And now you can see how much room I have underneath and how much cleaner it looks. I am storing my scrap booking materials and all our pictures that have yet to be organized under there for now. I'm hoping it motivates me to do something with them.
And so you don't have to scroll up again, here's another before and after:
While I was at it, I made some other switcharoos in the house. More to come on that tomorrow. Hint, you can see some of it in the above pictures on the walls.
Anyone else gotten creative in the world of shelving? Has anyone used Annie Sloan paint and wax before?
- I don't have time
- I don't have the energy right now
- I only have a circular saw and I was pretty sure I needed a table saw for cutting the correct angles for a table
So I've just dealt with the space for said time. But I finally had enough. The area just got junkier and junkier as the cords, boxes, dog crate, etc piled up "behind the couch".
It's hard to tell in the picture above (probably because I was always sure to keep it hidden in pictures) but behind that couch is scary. It really is most noticeable when you first walked in and when you sat on the couch and when you sat at the dining table and when you walked in from the kitchen. OK so maybe it was really noticeable except in this picture.
I finally decided to make my own hanging shelf like I did in the kitchen. A sort've faux console table if you will. After all, no one will really know since it's hidden behind the couch anyway. And it was fairly immediate (low labor) and much cheaper.
Off to Lowe's I went to find wood. I bought a standard 16"x96" stain grade wood ($30) and had them cut it to my size (80"). They had cheaper lumber available but since I wasn't planning on painting but rather staining, I needed a higher quality board. I could have bought a 72" standard size for much cheaper but I knew deep down I'd miss those 8" behind the couch and regret it. Next I simply stained it with the same stain from the table project and then sanded it down a bit to give it a worn look.
I decided I didn't want a slick look (i.e. polyurethane) so I checked around and bought some wax instead.
I'm not going to lie. This stuff isn't cheap ($25!) but it's well worth it. I loved how easy it went on (simply apply with some cheese cloth, let dry and buff) and how it gives it a great muted sheen like furniture you buy in store. I knew I would need some for a dresser I plan on painting (some day) too. I only had to use a small amount for this project since I only did one side.
Then came the hanging...and by this point the boys were home. Charlie was an awfully good helper (albeit slightly scared of the "momo" or drill). Don't mind me. I'm still in my workout clothes from the morning.
Using simple brackets (3 to be exact) it was simple and easy to hang.
Don't mind the unstained end. I fixed that when I realized I had forgotten to flip it over initially. Once I moved the couch back, it was fun to start decorating! Look at what a difference the longer table makes.
You can really see the length in this wider view.
And all the pretty things I can put on it now...
And now you can see how much room I have underneath and how much cleaner it looks. I am storing my scrap booking materials and all our pictures that have yet to be organized under there for now. I'm hoping it motivates me to do something with them.
And so you don't have to scroll up again, here's another before and after:
| (obviously an old picture - RIP kitty Sasha) |
While I was at it, I made some other switcharoos in the house. More to come on that tomorrow. Hint, you can see some of it in the above pictures on the walls.
Anyone else gotten creative in the world of shelving? Has anyone used Annie Sloan paint and wax before?
Subscribe to:
Posts (Atom)